Sleigh Ride Bells Decor - Terrain Dupe
- Nov 16, 2020
- 3 min read
Updated: Aug 25, 2022
Holiday decor can get a little repetitive - piney garland, bottlebrush trees, twinkling lights - you know the drill. That's why when I saw this rustic, magical Sleigh Ride Bells piece from Terrain, I knew I had to add it to my holiday collection. But then, the dreaded price tag - $150!
After perusing the web, I was able to track down materials that would give me the same look, with upgraded gold bells, for $100 cheaper. And as my pre-Christmas gift to you, I'm sharing exactly how it all comes together.


What you'll need:
- 2" wide, 50" long leather strap - 12 35mm gold sleigh bells - 2.65mm faux suede lace - leather hole punch - ruler - scissors - pencil - sharpie - small scrap piece of cardboard - 1 hour

Instructions:
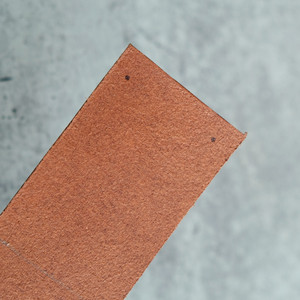
Step 1: With the right side of the leather strap facing down, measure to determine an even placement of each of the 12 sleigh bells. With a pencil, lightly draw a line across the back of the strap where each of the 12 bells will be attached.

Step 2: With a scrap piece of cardboard, determine the hole punch placement for each of your bells. I practiced a few times with cardboard, a bell, and a small piece of suede lace before punching into the leather strap. This helped me determine how large I needed to make the holes as well as how far apart to set them. The cardboard also served as a "pattern" which I used to mark the holes along each of the bell lines. With a Sharpie, go ahead and mark all 24 holes along the back of the strap for the bells.


Step 3: This is where it gets fun. Now that all of the bell holes have been marked, it's time to punch! With a good quality leather hole punch, like the one linked above, this shouldn't be a difficult task and you'll quickly find, is oddly satisfying.


Step 4: After all of the bell holes have been punched, it's time to trim twelve equal length pieces of faux suede lace. Mine were about 5" in length. Thread each piece of lace through the bells and attach to the front side of the leather strap, securing in the back with a double knot.

Step 5: You're almost there! In order to hang your sleigh bells, you'll need to create a loop at the top of the leather strap. Since I tend to wing most things, I winged this as well. I eye-balled the corners of the top of the strap and punched holes near the edges of either side. I then doubled-up on faux suede lace and secured in the back of the strap with large knots.


Step 6: Lastly, trim any excess lace that sticks out too far from the back of the leather strap. This is totally up to your personal preference. I opted to have some strands longer than others, adding to the perfectly-imperfect, handcrafted look.

And there you have it! Your very own sleigh bell decor at a fraction of the price! There are so many ways to style this piece; hang it straight, wrap it up, add it to a wreath, put it on the porch. The options are limitless! I can't wait to see your very own sleigh bell creations, so don't forget to tag me in your projects on Instagram (@anothermessbyjess). Merry jingling - and remember, you're guaranteed a place on Santa's Nice List if you clean up your mess. ;)


Comments